Chapter 2
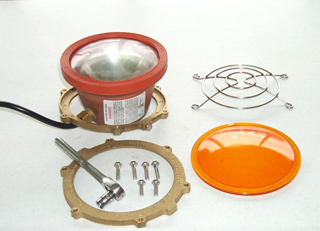 |
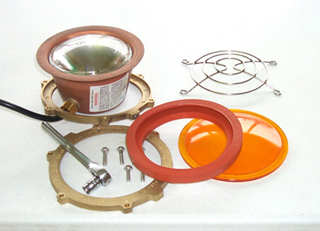
Lens and Gasket Removal
With the top and bottom flange removed the lens and lens
gasket will be exposed.
|
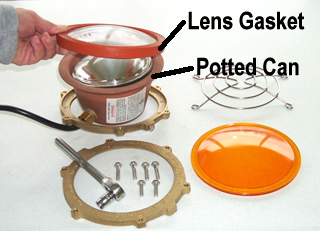 |
The Silicone gasket will lift off of the ridge of the
potted can assembly. Sometimes it will stick to the can and
is difficult to break free. Being careful not to damage the
gasket, you can use a straight sided screwdriver between the
lens gasket and the ridge of the potted can. Sometimes the
bulb will also be stuck to the lens gasket.
|
 |
If you are only changing the bulb go to "Chapter 3" if you are changing the
lens continue on this page.
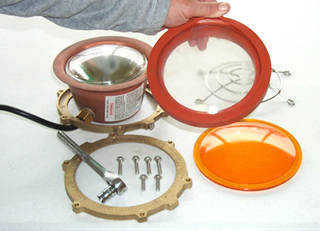
To remove the lens from the lens gasket, begin at one
edge and slowly pry the gasket from the lens. Work your way
around the outer circumference of the lens.
|
 |
While working around the lens begin to place the
gasket behind the lens until the lens is completely free
from the gasket. |
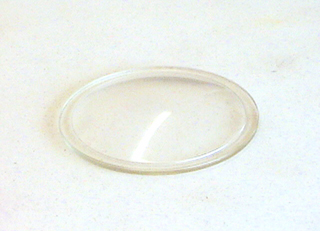 |
The lens is constructed out of glass and are fragile.
They are available in a variety of colors.
Clear
Light Red
Dark Red
Amber
Dark
Green
Dark Blue
and
Turquoise |
 |
The red silicone gasket houses the lens. It is
compressed between the top flange, potted can, and the
bottom flange to make a water tight seal.
|
 |
Now that the lens and gasket are removed, the bulb is
exposed and ready for removal.
Proceed to Chapter
3
| |
 |
|
|
Home Page - Order OASE Parts - Order RainJet Parts
|